Trying to install carpet tiles without glue can be a disaster. They’ll keep lifting and bunching, looking more like a rug than a carefully installed floor.
Fortunately, you don’t have to choose between an ugly tiled floor or glue–there are other solutions! Several methods can be used for carpet tile installations, including double-sided tape and pressure-sensitive modular tile glue. Follow these steps to ensure a successful installation.
Discover the secrets behind perfectly gluing down your carpet tiles every time.
Every day we all encounter challenges requiring a bit of genius and ingenuity. Even the most experienced carpenter can come up against an issue that’s sown resistance for years.
The trick is to tap into our resourcefulness and discover the secrets of how to glue down carpet tiles perfectly every time. It’s incredibly frustrating when you’ve invested so much time & effort only to have it fail due to a bad adhesive job.
That’s why researching the tried-and-tested methods provides peace of mind, knowing you won’t be repeating past mistakes. With this knowledge, small projects that previously seemed daunting become surprisingly achievable – if done right!
It’s all about getting a thorough understanding of what products best respond to your particular situation. Whether creating a custom design on your own or working with a professional company, ensuring your tile job stays firm begins with preparation and ends with correct adhesive application methods.
By diligently following these steps, you are guaranteed consistent results time after time; no more vague hints or outdated techniques – just success! You’ll have the satisfaction of being able to create beautiful and secure carpet tiles every time you lay down a new floor.
The first step is to choose a suitable adhesive for your carpet tiles. Different tiles require different adhesives, so select the one that best suits your needs. If you’re unsure, consult a professional who can advise you on the best product for your project. For now, we will provide you with some of the easiest options to install your glue-down carpet tiles below:
Tackifier adhesive
Tackifier adhesive is a common adhesive used to glue down carpet tiles. It has a set open time of thirty to forty minutes. Once it has reached this time, it is ready for installation. However, it is important to remember that tackifiers will not work properly on tiles that have been poorly made or subjected to water on the surface.
Tackifier is a low-tack adhesive designed to provide a permanent, tacky film to adhere carpet tiles to various substrates. It can also be used for adhesive bonding on rubber and foam-backed floor coverings. The adhesive can be applied with a paint roller or tray and should cure for about 20 minutes before it can glue down carpet tiles. It dries to a clear film in about thirty to sixty minutes.
This high-performance adhesive is available in spray canisters. Once the adhesive is applied, the surface should be clean and dry. It should be held about 10 to 20 cm away from the tiles, and should have an eighty percent coverage. The coverage rate varies according to the tile’s size and thickness and the subfloor’s porosity.
The adhesive should be applied evenly with a trowel or roller. If the adhesive is too wet, it is difficult to remove the tiles. This may require the use of a stripping machine. Moreover, the backing of the adhesive may remain on the subfloor, and over boarding or screeding may be required to bring the subfloor back to its original level. After applying the adhesive, ensure the subfloor is thoroughly dry and has reached the appropriate temperature.
Pressure-sensitive modular tile glue
Pressure-sensitive modular tile glue is a special latex-emulsion adhesive designed for carpet tiles and matting. This adhesive is water-resistant and non-flammable. It also offers excellent resistance to vinyl plasticizer migration. The adhesive remains tacky for a long time, allowing you to pick up and move tile sections without affecting the adhesive. This makes reinstallation easier.
Pressure-sensitive modular tile glue is a great option for flooring. Its releasable formulation makes it easy to replace tiles and cushioned carpets. It’s also low-odour and solvent-free. It works well in areas with high traffic. It also withstands up to 90% relative humidity.
When applying the adhesive, use a brush or roller. You may also use a straight-edge trowel to apply it evenly. If you don’t have a trowel, you can use a scrap piece of tile to serve as a makeshift straight-edge trowel. Tip the glue evenly from left to right, spreading it over the floor. Be careful not to drown the glue because it will take longer to dry.
Double-sided tape
Carpet double-sided tape adheres carpet tiles to the floor with a strong adhesive. It is easy to apply and can be cut to size. This type of tape is often used as an alternative to carpet tile glue. It is less messy than the traditional wet adhesive and can be applied over multiple surfaces.
Exhibition-grade tape is another option for securing carpet tiles. It is a low-cost alternative that can be cut to fit a particular area. It can be placed on the four corners of the tile and will adhere to most dry, smooth surfaces, including ceramic tiles, laminate flooring, concrete tiles, stone, plywood, chipboard, and painted floors.
Double-sided carpet tape can be applied to both hardwood and tile floors. However, be aware that some adhesives used for rugs can damage hardwood floors and vinyl floors. To ensure that your floors are safe, consider using silicone-based tape. Also, be aware that synthetic rubber rug tape can rot wood flooring.

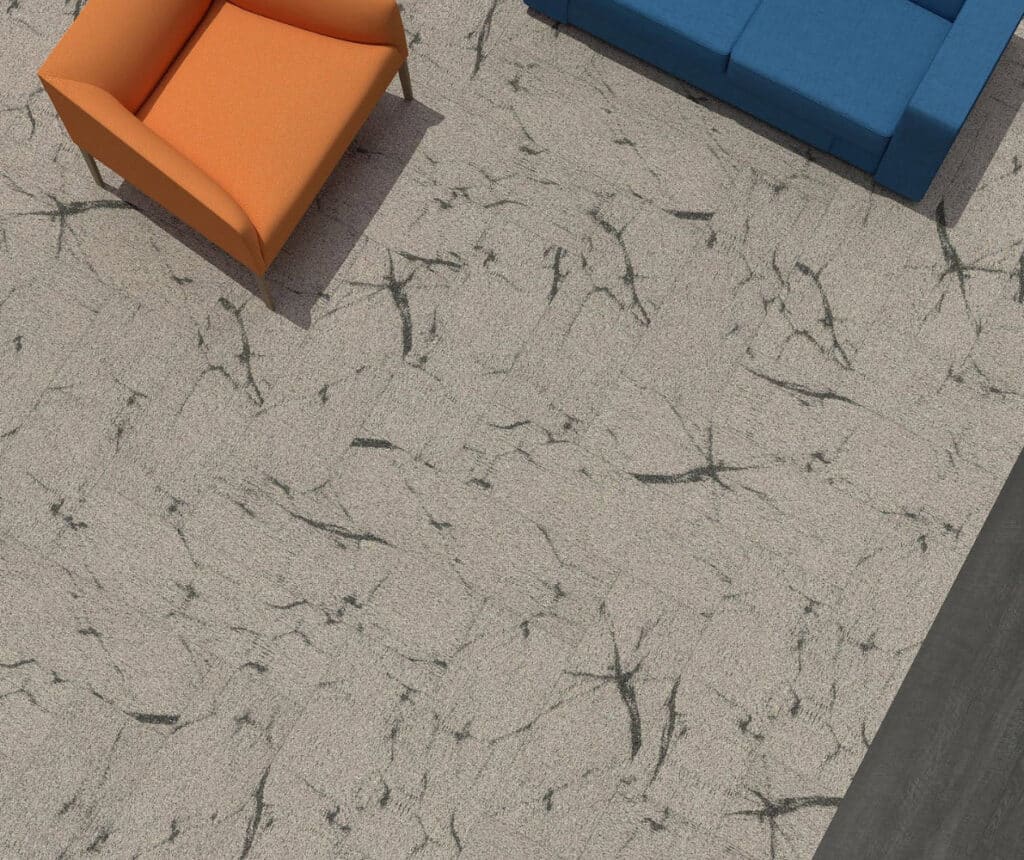
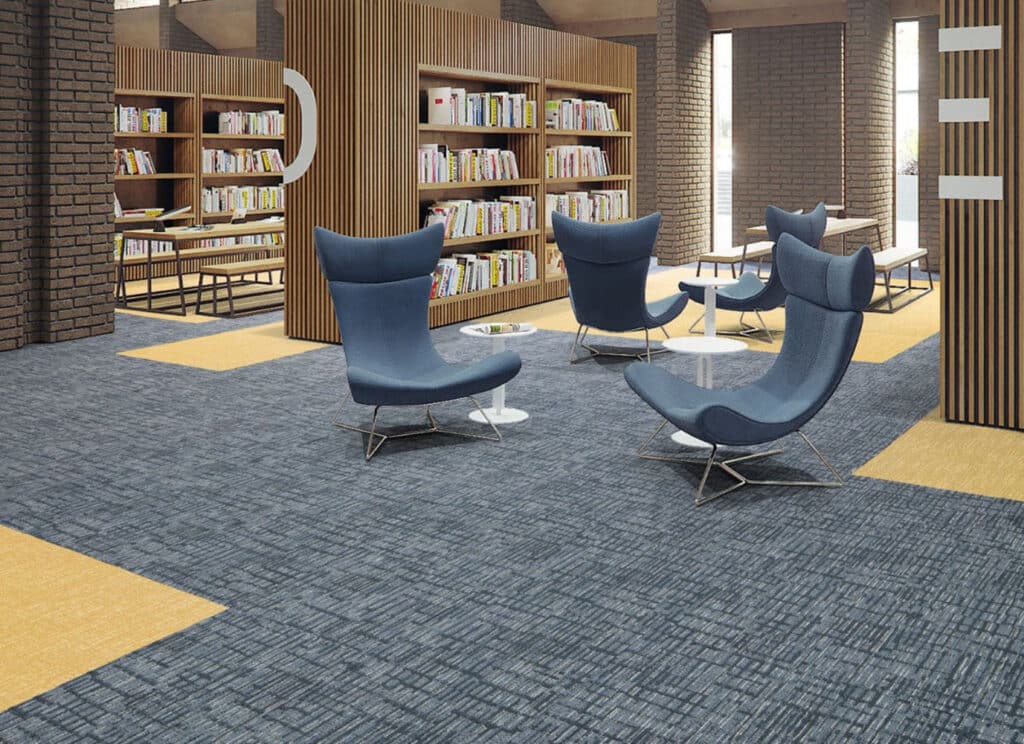
Find out how to lay your carpet tiles the right way.
Recognizing that perfect results come from exceptional methods, you’re eager to find the right way to lay your carpet tiles. You want best practices and results that will stand up over time and deliver the lasting quality you strive for.
Unveiling a new approach, you must embrace the challenge of devising the correct techniques to create stunning designs and lasting looks with carpet tiles. Knowing that success comes from fearless experimentation, it’s time to take chances and discover what works.
Embrace the changes as they come, exploring how different themes affect how your carpet tile looks in different lighting or with unique accents accompanying it. Take every opportunity to work with colour shapes, contrast levels, textures and other elements as you learn how to put them together ideally.
Commit to devising superior methods that capture the perfect mix of light, texture and design for truly spectacular results every time. With focus and purpose in mind, know that your exploration will uncover secrets and strategies for nailing down precisely what works with elegance and finesse not previously thought possible.
It’s time to start this journey toward crafting masterpieces using your carpet tiles while getting impressive outcomes like never before!
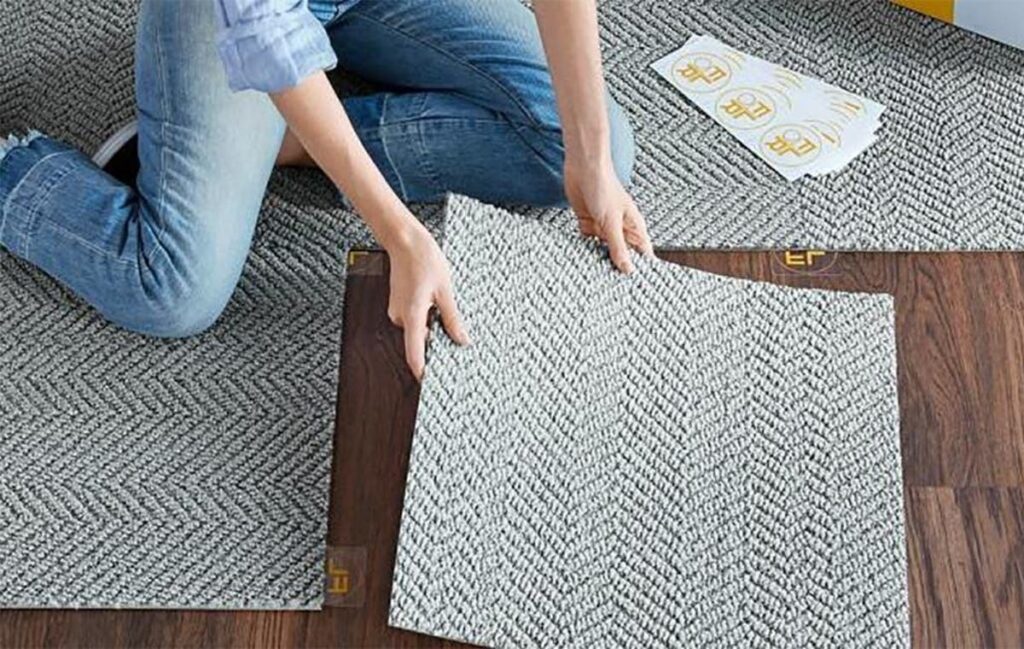
Directional arrows for carpet tile installation
There are a few different ways to install glue-down carpet tiles. Some methods are more complex than others. The Ashlar method maintains a single direction for linear and staggers tiles between rows. Another installation method is the random installation method, which rotates tiles randomly. Each tile in a row should have a direction arrow, and the arrows should all point in the same direction.
When gluing down carpet tiles, be sure to use the arrows on the back of the tiles to ensure that the pattern is aligned. If the arrows do not point in the same direction, the tiles will have different colours and appear uneven. When you have the correct orientation of the arrows, they will appear uniform and even.
Before gluing down carpet tiles, lay them out on a flat surface. Make sure they are dry, and the seams are not too tight. After gluing the tiles down, they should be vacuumed to remove excess dirt. They can also be shampooed and hosed down, but you should take caution while cleaning them. Exposure to extreme heat and moisture may cause them to deteriorate or fade.
Once you have glued down carpet tiles, they should be turned 1/4 turn. Be sure to align the arrows in the same direction and ensure that the tiles are firmly and evenly pressed down on the subfloor. You can also apply weight to the tiles to secure them in place. When gluing down carpet tiles, you can also place non-staining building material paper or plastic sheeting over the tiles to prevent moisture from escaping.
How to prepare Concrete subfloor for carpet tile installation
When laying glue down carpet tiles, it is important to have a clean concrete subfloor. This will ensure that the adhesive will adhere properly to the surface and form the strongest bond possible. Before applying glue to carpet tiles, however, the surface must be thoroughly cleaned of dirt and oil. Using non-abrasive cleaning products free of solvents and oil-based compounds is important to clean the surface and remove debris. After cleaning, allowing the area to dry overnight before setting the tiles is important.
Glue-down carpet tiles are a great option for homeowners who don’t want to deal with padding or tack strips. Additionally, these carpets are easy to install and require no complex measuring or stretching. A simple installation for a small room can be completed in one day, even by a beginner.
You can install carpet tiles directly onto a concrete subfloor or over existing flooring. If you are unsure whether you should install glue-down carpet tiles on a concrete floor, you can visit a carpet tile store and ask the staff for advice. They can provide you with tiles samples to ensure you make the best decision.
When installing glue-down carpet tiles over a concrete subfloor, it is vital to ensure that the concrete has a moisture level appropriate for the type of flooring you are installing. Moisture in the concrete subfloor can lead to the formation of mould, mildew, and other harmful microorganisms, and this can contribute to a poor indoor climate.
Our Recommended Carpet Brands:
- Mannington
- Mohawk
- Masland
- Shaw
- Beaulieu
Choose Canadian Home Style for your Vancouver flooring projects.
Canadian Home Style is your family-owned and operated flooring retailer with a showroom in North Vancouver, BC. We provide full-service commercial and residential flooring solutions across the Lower Mainland with an extended warranty. We are proud members of the BC Floor Covering Association (BCFCA) and the National Wood Flooring Association (NWFA). In addition, we have won the Consumer’s Choice Awards back-to-back in 2021, 2022, and 2023 for our commitment to business excellence. We are considered the highest-rated flooring experts in Metro Vancouver. We pride ourselves on holding the highest standards in the flooring industry. To uphold our high standards, we have a strict policy of “not selling or displaying any products that we wouldn’t want in our own homes.” Before we select a product to feature, we carefully assess product quality, off-gassing, warranties, and responsible sourcing. Book now to visit our North Vancouver flooring showroom; we can help you choose the perfect floor for your home or business.
Our mission is to help homeowners create beautiful homes that reflect their lifestyles while reducing energy consumption and conserving resources. We do this by providing our clients with innovative products, services and education. Our vision is to become Canada’s leading sustainable flooring solutions provider. Our values include integrity, respect, honesty and transparency. These principles guide us as we strive to provide outstanding customer service.
We believe that our success depends on the success of our clients and their customers. We work hard to ensure our clients get the most out of their investments. Our team consists of highly skilled professionals who are experts in their field. They have years of experience working together and know what works and what doesn’t. They understand how to solve problems quickly and efficiently. We are committed to providing excellent customer service. We listen carefully to our client’s concerns and suggestions. We take these into account when planning and executing projects. We always strive to exceed expectations.
Services We Offer:
Main Areas of Service in British Columbia:
Frequently Asked Questions
Which flooring is best for homes?
Hardwood flooring or cork is the best option for your home. These materials do not off-gas or release harmful toxins into the air like some synthetic options, such as vinyl or carpet. Hypoallergenic cork and hardwood make them an excellent choice for anyone with allergies or sensitivities.
What are the five types of floors?
Flooring options include laminate, tile vinyl, carpet, vinyl, and hardwood. Each flooring type has its own benefits and is suitable for different rooms. Hardwood floors are classic and elegant but require more maintenance than other types of floors. Laminate floors can be durable and are easy to maintain, making them an excellent choice for high traffic areas. Tile floors are waterproof and easy to clean, making them a good choice for bathrooms and kitchens. Vinyl floors are affordable and easy to install, making them a popular choice for DIYers. Carpet floors are warm and inviting, but require more attention than other floors.
What kind of floor is waterproof and what type?
Two types of waterproof flooring are available: luxury vinyl flooring and tile. Waterproof flooring can be used for every room, from bathrooms to basements and laundry rooms. Waterproof flooring should be a priority if you have kids, pets, or live in areas that see a lot.
What kind of underlayment do I need for floating floors?
An underlayment is a layer of thin foam placed between the laminate floor and the subfloor. It absorbs sound and provides cushioning. A 3-in-1 underlayment should be used, which includes a moisture barrier, sound barriers, and foam padding. This will help to protect your laminate floor from moisture and damage.
How to choose the right wood flooring?
Hardwood floors can be beautiful, durable and easy to maintain. If they show signs of wear, it may be time to replace them. These are five tips that will help you make an educated decision if your hardwood floors need to be replaced.
- Determine if you can replace your hardwood floors. This step is critical as it lets you know if you need a professional flooring contractor to do the job or a DIYer. Homeowners should hire professionals for their flooring projects. You may find it more practical to take on the project yourself. Consider tackling the project if your skills are in woodworking.
- You can decide how much you want to spend. There are two methods to determine the cost of hardwood floors: either an estimate that is based on square footage (SF), and a calculation that calculates the total cost for each foot. The square footage of your house is multiplied by $6-30 to determine the cost per SF. Add additional costs, such as installation fees, rip-outs, baseboards, or delivery.
- You can choose the type of hardwood floor that you would like for your house. There are two types of wood available: engineered and solid. The most preferred wood type in Vancouver is Engineered due to its environmental factors (humidity and style preferences). The type of wood you desire is another thing to consider. Maple, Oak and Hickory are some of the most sought-after species.
- Choose the right colour and texture for your hardwood flooring. Remember your hardwood floor is in every room, and you’re in contact with it visually and physically every day. The colour and stain you choose should match the decor and style of your home.
- The right contractor is the one for the job. Once you’ve decided to replace your hardwood floors, it’s time to find a professional flooring contractor. Referring to family and friends is the best way of finding a reliable contractor. You can also search online directories, such as Better Business Bureau. Hardwood floors are a huge decision. These five tips will help you make the right decision for your home.
Is cork suitable for kitchen flooring?
Cork is a good choice for kitchen flooring. Cork is strong, durable, easy to clean and has a natural resistance against mold and mildew. It’s hypoallergenic and is comfortable to sit on for long periods.
Statistics
- To figure out how much your floor will cost, calculate the room’s square footage, then add 5 to 10 percent for cuts and waste. (thisoldhouse.com)
External Links
youtube.com
en.wikipedia.org
How To
How to Remove Scratches From Hardwood Floors
Scratches occur when living in a wooden floor house. They are caused by furniture being pushed across the floor without protection. It’s worth mentioning that most flooring manufacturers offer touch-up kits you can purchase when you’re ordering your hardwood flooring. You can make your own touchup pen if your hardwood doesn’t come with one.
You may need to use a color coordinating wood filler in order to fill deep scratches. Next, use a little stain or polish that matches your floors to cover up the scratch. To fill in the area, you can use a polish that matches the color of your floors or a little bit of wax. For a quick fix you can also use crayons to match the flooring color. If you don’t have matching polishes, you can always mix a few to create your custom color.
You can remove scratches from hardwood floors by removing the source. That means being careful with your furniture and ensuring that you have something to protect your floors from scratches. You should also avoid wearing high-heel shoes on hardwood floors. They can cause obvious dents. If you have pets, their nails can also scratch hardwood floors, so it’s best to trim them regularly.
Here are some more tips to avoid scratches on hardwood floors.
- You can prevent dirt and grime from being tracked into your home by installing mats or rugs at every entrance.
- Protect the floor by placing mats or rug in high-traffic areas such as couches and chairs to prevent furniture from scratching it.
- Avoid scratches by using furniture glides and coasters on your furniture’s legs.
- Moving heavy furniture can cause scratches on the floor. Instead of dragging heavy furniture across the ground, lift it.